Welcome to Our 3D Printing for Beginners Series
3D Printing for Beginners Series
- A 3D Printer Overview
- 3D Modeling Options
- Slicer Software Explained
- Fun with Fusion 360
- Toying With Tinkercad
Welcome to A 3D Printer Overview, the first section of our 3D Printing for Beginners series. To cover all of the information needed to get you started with 3D printing while staying reader-friendly, we’ve divided the information into multiple sections. In this section we will discuss:
- How to get started on your 3D printing journey.
- Key differences between the two main 3D printing technologies currently available.
- Four essential parts of a 3D printer you should look at when making a purchase.
- The difference between PLA and ABS, two of the more common filament materials you will run into.
- The two main diameters PLA and ABS filament are available in.
If you’d like to be added to our email list, contact us now. We will be happy to notify you as each new section of our series is completed. Feel free to mention any additional topics you’d like to see discussed in the series as well. Your 3D printing journey is just beginning, and we’d like to help you in any way we can.
Getting Started
The world of 3D printing has been growing since the 1980s, and 3D printers are not just for professionals anymore. You can now find affordable options for personal and educational use as well. But with the variety of options available, how do you know you’re getting just the right printer for your needs? That is just one of many questions you may ask yourself, and that is the question we hope to help you answer today. And if you’re wondering whether 3D printing is something you can do with your kids, it is. Check back in a few weeks for our upcoming in-depth look at Tinkercad. Tinkercad is a free easy-to-use app for 3D design, and more. It’s the ideal software for you and your kids to learn together.
Four Main Steps:
- First, you need access to a 3D printer. If you’re not ready to purchase a printer of your own, try a local UPS store, the public library, or even a local Community Makerspace.
- Second, you need to purchase the correct filament for your printer.
- Third, you need a 3D model of the object to print.
- Fourth, you will need to use Slicer software to transform your 3D model design into a set of instructions that your printer will understand.
Once you have a printer, and you’re looking for information on 3D models and how to print them, our 3D Modeling Options and Slicer Software Explained sections will get you going.
Our goal is to answer as many of your questions as possible within our 3D Printing for Beginners series. You may find yourself challenged at times, but through it all, you will have fun. It won’t be long before you take your 3D printing skills to the next level.
3D Printers
At the moment there are two main 3D printing technologies available in the consumer market. These technologies are Fused Deposition Modeling (FDM) and Vat Polymerization, which itself is composed of Stereolithography (SLA), Masked Stereolithography (MSLA), and Digital Light Processing (DLP). Before we proceed with an in-depth look at FDM printers since it is the more popular choice for the first-time buyer, we’ll go through a quick comparison of these two printing technologies.
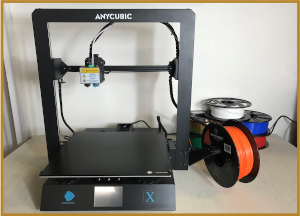
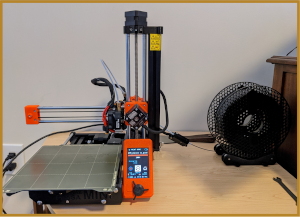
Fused Deposition Modeling (FDM)
A Fused Deposition Modeling (FDM) printer is characterized by the process in which it deposits layers of melted thermoplastic, one on top of another, which cools into a finished piece. These printers are currently the most commonly available 3D printers for consumers. Plus, FDM printers are generally cheaper than their Vat Polymerization counterparts. There’s also the benefit of being able to choose from a variety of filaments, allowing consumers to choose between different strengths, weaknesses, and price points.
Vat Polymerization
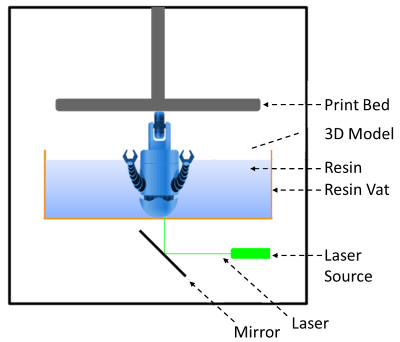
Vat Polymerization is characterized by a bed of photosensitive resin that is hardened by a laser or digital projector. These printers are capable of printing with much finer detail than the FDM printers. Their resolution is only limited by the laser or pixels in the projector compared to the limitation the FDM printer has with the precision of its motors and nozzle size.
Another benefit lies in how the layers are formed. Resin prints tend to have smoother sides instead of the noticeable layer lines found with FDM printers. This creates stronger 3D printed objects since separated layers are less of a worry.
After your print is finished you also need to do some post-processing. You have to remove the excess resin in an alcohol bath. And you then have to finish the curing process, usually with a UV light. There are a lot of benefits to Vat Polymerization printers. Unfortunately, their relatively higher cost, the extra processing, and potential hazards with the resin and its fumes make it harder to recommend them as a starting printer.
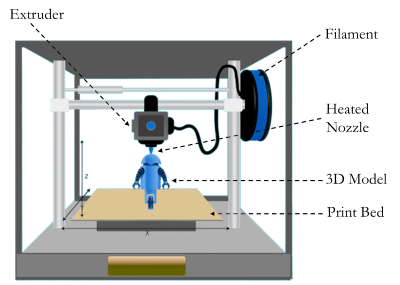
Dissecting the FDM Printer
We aren’t going to provide an in-depth look at each part of an FDM printer, but we do want to discuss some of the more important areas we feel you should familiarize yourself with when deciding on what printer to buy. Four areas you should investigate are the extruder, the print bed, the nozzle, and the filament the printer uses.
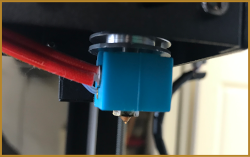
Extruder

The extruder is the mechanism that drives your filament from its spool into the HotEnd to be melted and extruded through the nozzle onto the print bed. You will find the extruder located in one of two areas. Either just above the HotEnd or attached to the printer frame down by the spool of filament.
If the extruder motor is located just above the HotEnd, then it is a Direct Drive extruder. This style extruder will pull the filament from the spool before it is directly pushed into the HotEnd to be melted and extruded through the nozzle. The alternative method, the Bowden extruder, is designed with the motor located by the spool. From this position, the extruder pushes the filament through a tube that leads the filament into the HotEnd to be melted and extruded through the nozzle. There are pros and cons to both methods as listed below.
Direct Drive Extruder
A direct drive extruder benefits mostly from its close proximity to the hot end and the short distance the filament must travel between the two. This allows for more control of the filament and quicker and more precise retraction which helps combat stringing and oozing.
Another benefit of this proximity to the hot end is the ability to use more types of filament. A direct drive extruder can use filaments that require hotter printing temperatures and filaments that are more flexible. The plastic used in Bowden extruders prevents the use of higher temperatures, and the distance away from the extruder’s hot end causes flexible filaments to bend or crimp.
The biggest drawback to direct drive extruders is that the motors being attached to the hot end will lead to more weight and thus lower stability and less accuracy.
Bowden Extruder
The benefits of a Bowden extruder lie in keeping the size and weight of the hot end down which allows for more precise and faster printing as well as the ability to have a larger print volume while keeping the same frame size. The cons to Bowden extruders are pretty much the inverse of the direct-drive extruders. They have less control of the filament as it travels through the tube to the hot end, jams and kinks can form in between the Bowden tube and the hot end, and if the hot end gets too hot the tube could melt, limiting some of the filaments that can be used by the printer.

Nozzle
The 3D printer nozzle is the part of the printer that will deposit the melted filament that was previously pushed/pulled into the hot end. There are multiple choices available, so hopefully, the following information will help you decide which nozzle fits your needs.
Most 3D printers come equipped with a .4mm brass nozzle and this nozzle has become the standard. The .4mm diameter offers a good balance between precision and speed. The brass offers great thermal conductivity at a relatively low price. Unless you have a specific print job that needs a different nozzle, you should be fine using the standard .4mm brass nozzle, at least at the beginning. You can upgrade your nozzle once a situation arises.
When looking at nozzle diameters just remember:
- If you need more detail and don’t mind increasing your print times, you can go for a thinner diameter nozzle.
- If you’re looking to decrease your print times and don’t mind increasing your tolerances, a thicker diameter nozzle can increase the amount of filament you can put down.
As far as the nozzle material is concerned you will commonly see brass, stainless steel, or hardened steel. Brass offers the best thermal conductivity of the three, which allows it to heat up faster. And brass is less expensive. This is countered by being the weakest and therefore the most susceptible to abrasive filaments and any external collisions. While not noticeable right away this damage can build up over time and reduce your print quality. As you move to stainless steel and then hardened steel you reduce the thermal conductivity and increase the price. But you will benefit from the increase in durability.
Filament
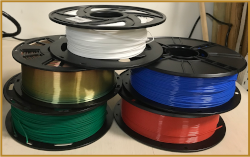
Filament is a thermoplastic that melts when heated, allowing it to be deposited layer by layer when you’re printing something. For now, we will look at PLA and ABS filament as they are two of the more common filament materials. We will also look at the two main diameters of filament you will see.
Type – PLA vs ABS
When you first get started in the world of 3D printing, PLA and ABS are going to be the main two filaments you will hear being talked about as they are commonly available and fit into their two niches well.
PLA is an overall easier material to print with, as it melts at a lower temperature, which limits warping. This helps with bed adhesion and allows for finer details when printing.
ABS is a bit stronger overall and is better suited for applications where the printed part must stand up to high temperatures. ABS also has the feature of being able to be smoothed with the use of acetone.
It is also worth noting that in both cases you are melting plastics and run the risk of introducing volatile particles into the air. You should do further research to make sure you are taking the necessary precautions whenever you are running your 3D printer.
Diameter – 1.75mm vs 3mm
The filament diameter you need is determined by which printer you select. You should find out what diameter the printers you look at use before deciding. Each filament size has its own pros and cons.
1.75mm filament tends to be the more common size these days, so it has the benefit of having more options in terms of manufacturers and pricing. At the moment, Amazon prices run at a difference of about $2-$3 per kg.
Besides the price and material availability, the main difference between the two filament sizes is what size printing they tend to do better with.
If you want to be able to print really fine details, and don’t mind increasing your print time, you can go with the smaller nozzle with the thinner 1.75mm filament for better control.
If you are more interested in faster print times and printing larger objects where larger layer lines are okay, you can go with the larger nozzle that uses a 3mm filament to extrude more filament faster.
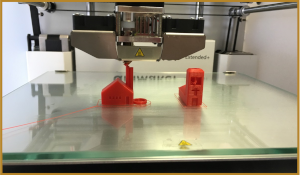
Print Bed
The print bed is the surface the nozzle will deposit the layers of plastic on. The more common print bed materials a printer will be equipped with are glass, Ultrabase, and PEI.
It’s worth mentioning that a common feature you’ll see on some printers is a heated bed. This is an optional feature, and while a heated bed can help with bed adhesion for PLA filament, if you have any interest in ABS or other types of filament, then you will almost certainly need to invest in a heated bed.
Glass Bed
A glass bed is probably the most common print bed you will find as it is a relatively standard material that holds a lot of great properties making it well suited for a print bed.
- A glass bed can be manufactured to be completely flat relatively easily.
- This material won’t warp over time.
- It works well as a heated bed. Though it may take a bit longer than other bed materials to heat up, the heat is spread across the entire surface well.
The main issue you will find with a glass bed is that printed objects, especially the larger ones, tend to stick to the surface. You can combat this with some common household items like painter’s tape, glue stick, or hairspray.
Anycubic Ultrabase
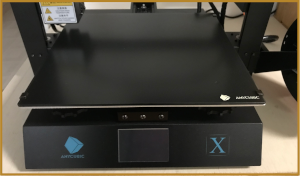
The Anycubic Ultrabase can be found as the default bed on some of Anycubic’s newer printers. The Ultrabase is a glass bed that has a special coating applied to the top surface that is supposed to aid in the surface adhesion which can be a glass bed’s biggest weakness.
When the bed is heated, the surface does a great job of adhering to the deposited plastic. Once the print has finished and the bed has cooled, it is supposed to release the parts with relative ease.
The main drawback I have read about with this style of bed is that over time the coating can wear out at which point your print bed will just work like a normal glass bed.
Spring Steel and PEI
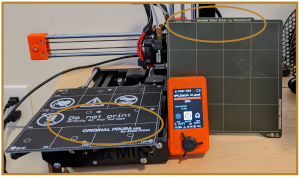
Offered by multiple brands these days, this print bed has a flat magnetic base that a thin sheet of steel with a PEI coating on it can attach to. This allows you to print onto the steal and once the print is done you can remove the steal and bend it to release your part.
The issue with this style of bed is they tend to have a higher initial cost and over time larger beds have a chance of warping. This can cause some printing issues and you may have to buy a replacement PEI sheet.

We hope the material we covered in A 3D Printer Overview has helped you answer some of the questions you had about 3D printers.
The next section of our 3D Printing for Beginners series, 3D Modeling Options, will take you through the two options available when it comes to 3D model designs. Whether you want to download a design or create one of your own, this next section is a must-read. Filled with our favorite choices for both categories, it’s a go-to spot for 3D modeling information. We hope to see you again during your 3D printing endeavor.
Note: Contact us now and we can email you as soon as additional sections in this series are finished.
3D Printing for Beginners Series
- A 3D Printer Overview
- 3D Modeling Options
- Slicer Software Explained
- Fun with Fusion 360
- Toying With Tinkercad
We hope you enjoyed the first segment of our 3D Printing for Beginners series.